
This article describes how to enable and connect to the O3's internal MQTT broker and subscribe/publish to topics using a third-party MQTT client application.
Enable the Internal MQTT Broker
The internal MQTT broker is disabled by default. To use a mobile or desktop MQTT client, you will need to enable the internal MQTT broker. Refer to Provisioning using Proviso and Provisioning using enteliWEB/enteliCLOUD for steps.
Mobile MQTT Client Example
For this example, we will use IoT MQTT Panel, a free mobile app available on Google Play.
Connect to the Broker
Open the IoT MQTT Panel app and tap Setup a Connection. Enter the name, address, and port of the MQTT broker that you are connecting to, add a dashboard, and then tap Create.
- To connect to the O3's internal MQTT broker, use the device's IP address.
- The default MQTT port over TCP is 1883.
- To publish to the O3's internal MQTT broker, you will need to enter a user name and password. If you are publishing to the O3's internal MQTT broker for the first time, use the following login credentials: username = user, password = admin. The username and password are case-sensitive. You can enter this information under Additional options. After logging in, change the default password in setting/mqttPassword.
Subscribe to a Topic
On the Connections page, you should see the connection that you have created. Tap the cloud icon to connect to the broker. The cloud icon changes color and shows a check mark when a connection to the broker is established.
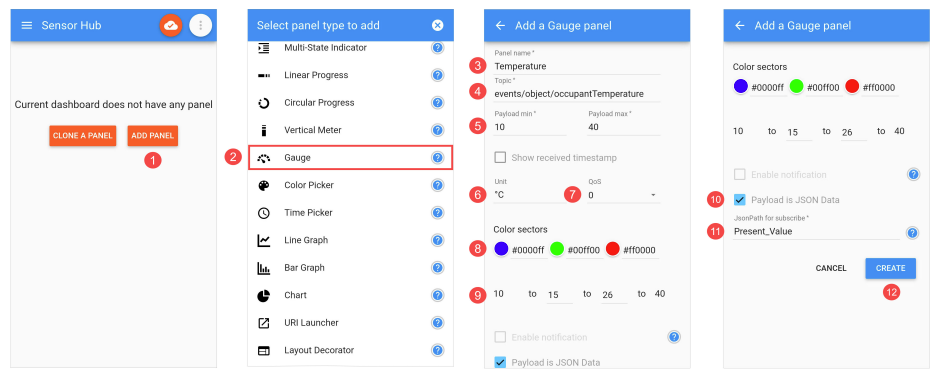
Next, the dashboard page opens and you are prompted to create a panel. Tap Add Panel, select a panel type, enter the details for the panel, and then tap Create.
- Subscribe topics on the O3 follow the format
events/object/SUBTOPIC. For example,events/object/occupantTemperature. - The JSON key you want to read is
Present_Value.
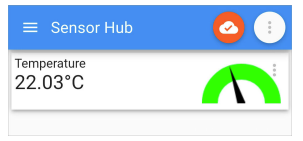
The created panel looks like this:
Desktop MQTT Client Example
For this example, we will use MQTT Explorer, a desktop MQTT client that lets you visualize, publish, subscribe, and plot topics. You can download it from http://mqtt-explorer.com.
Connect to the Broker
Open MQTT Explorer and click the Connections button to add a new connection. Enter the name, address, and port of the MQTT broker.
- To connect to the O3's internal MQTT broker, use the device's IP address.
- The default MQTT port over TCP is 1883.
In this example, we will be publishing to a topic, so we will also enter a user name and password. Click Save to save the settings, then click Connect.
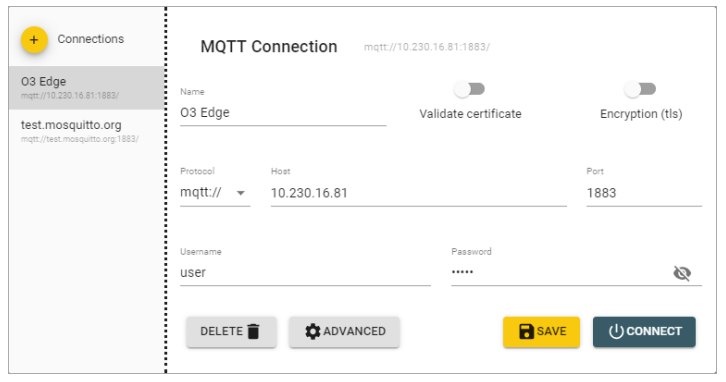
If you are publishing to the O3's internal MQTT broker for the first time, use the following login credentials: username = user, password = admin. The username and password are case-sensitive. After logging in, change the default password in setting/mqttPassword.
Publish to a Topic
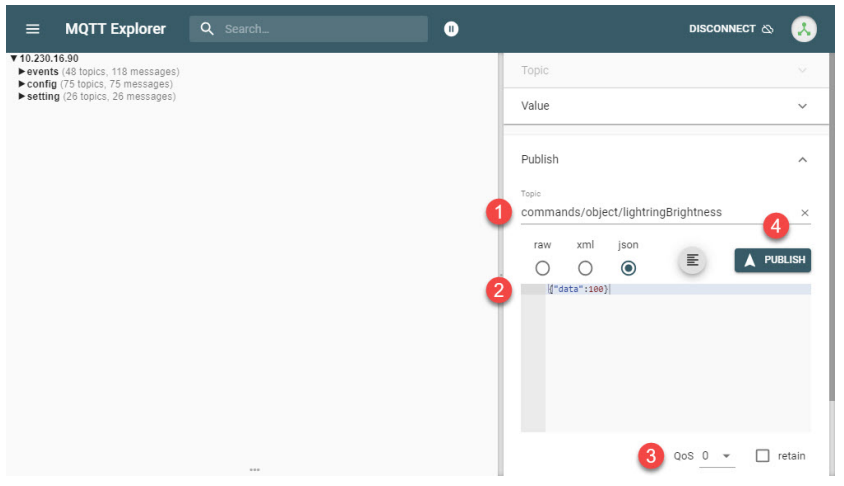
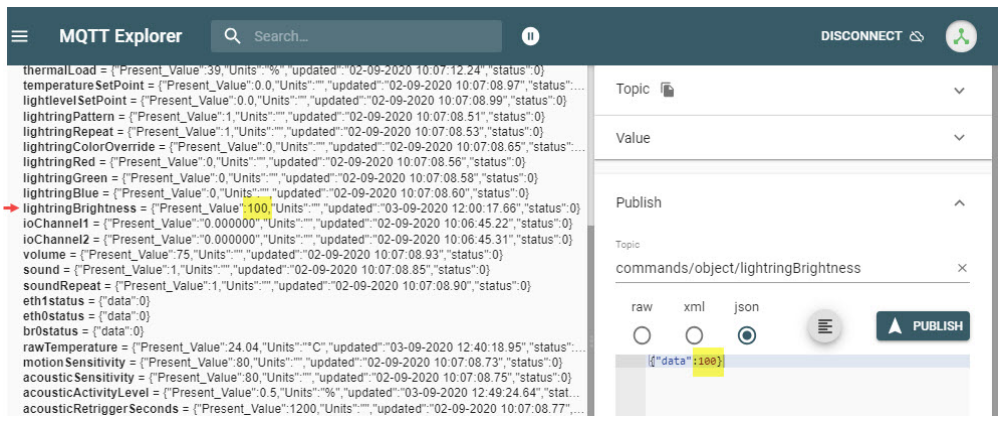
The main window is divided into two panes. On the left is a tree view of topics. On the right are panels for Topic, Value, Publish, and Stats. Expand the Publish panel and enter the topic that you want to publish to. Select json and enter the key-value pair that you want to modify. The value should be the new value that you want to publish. Select a QoS level, then click Publish.
- Publish topics on the O3 follow the format
commands/object/SUBTOPIC. For example,commands/object/lightringBrightness. - The JSON key you want to write to is
data.
After you click Publish, you can look up the corresponding subtopic under events/objects and verify that the Present_Value has changed.
Comments
0 comments
Please sign in to leave a comment.